How to Build a ZIP Code-Level Community Needs Assessment
Learn how to use, include, and analyze ZIP-code level data in the Community Needs Assessment, a feature available to all Premium Annual Subscribers.
Choose Your Location
Select Your Data
Explore Your ZIP-Code-Level Report
Step 1 – Choose Your Location
Log in to your Premium Annual account and then create a new Community Needs Assessment.
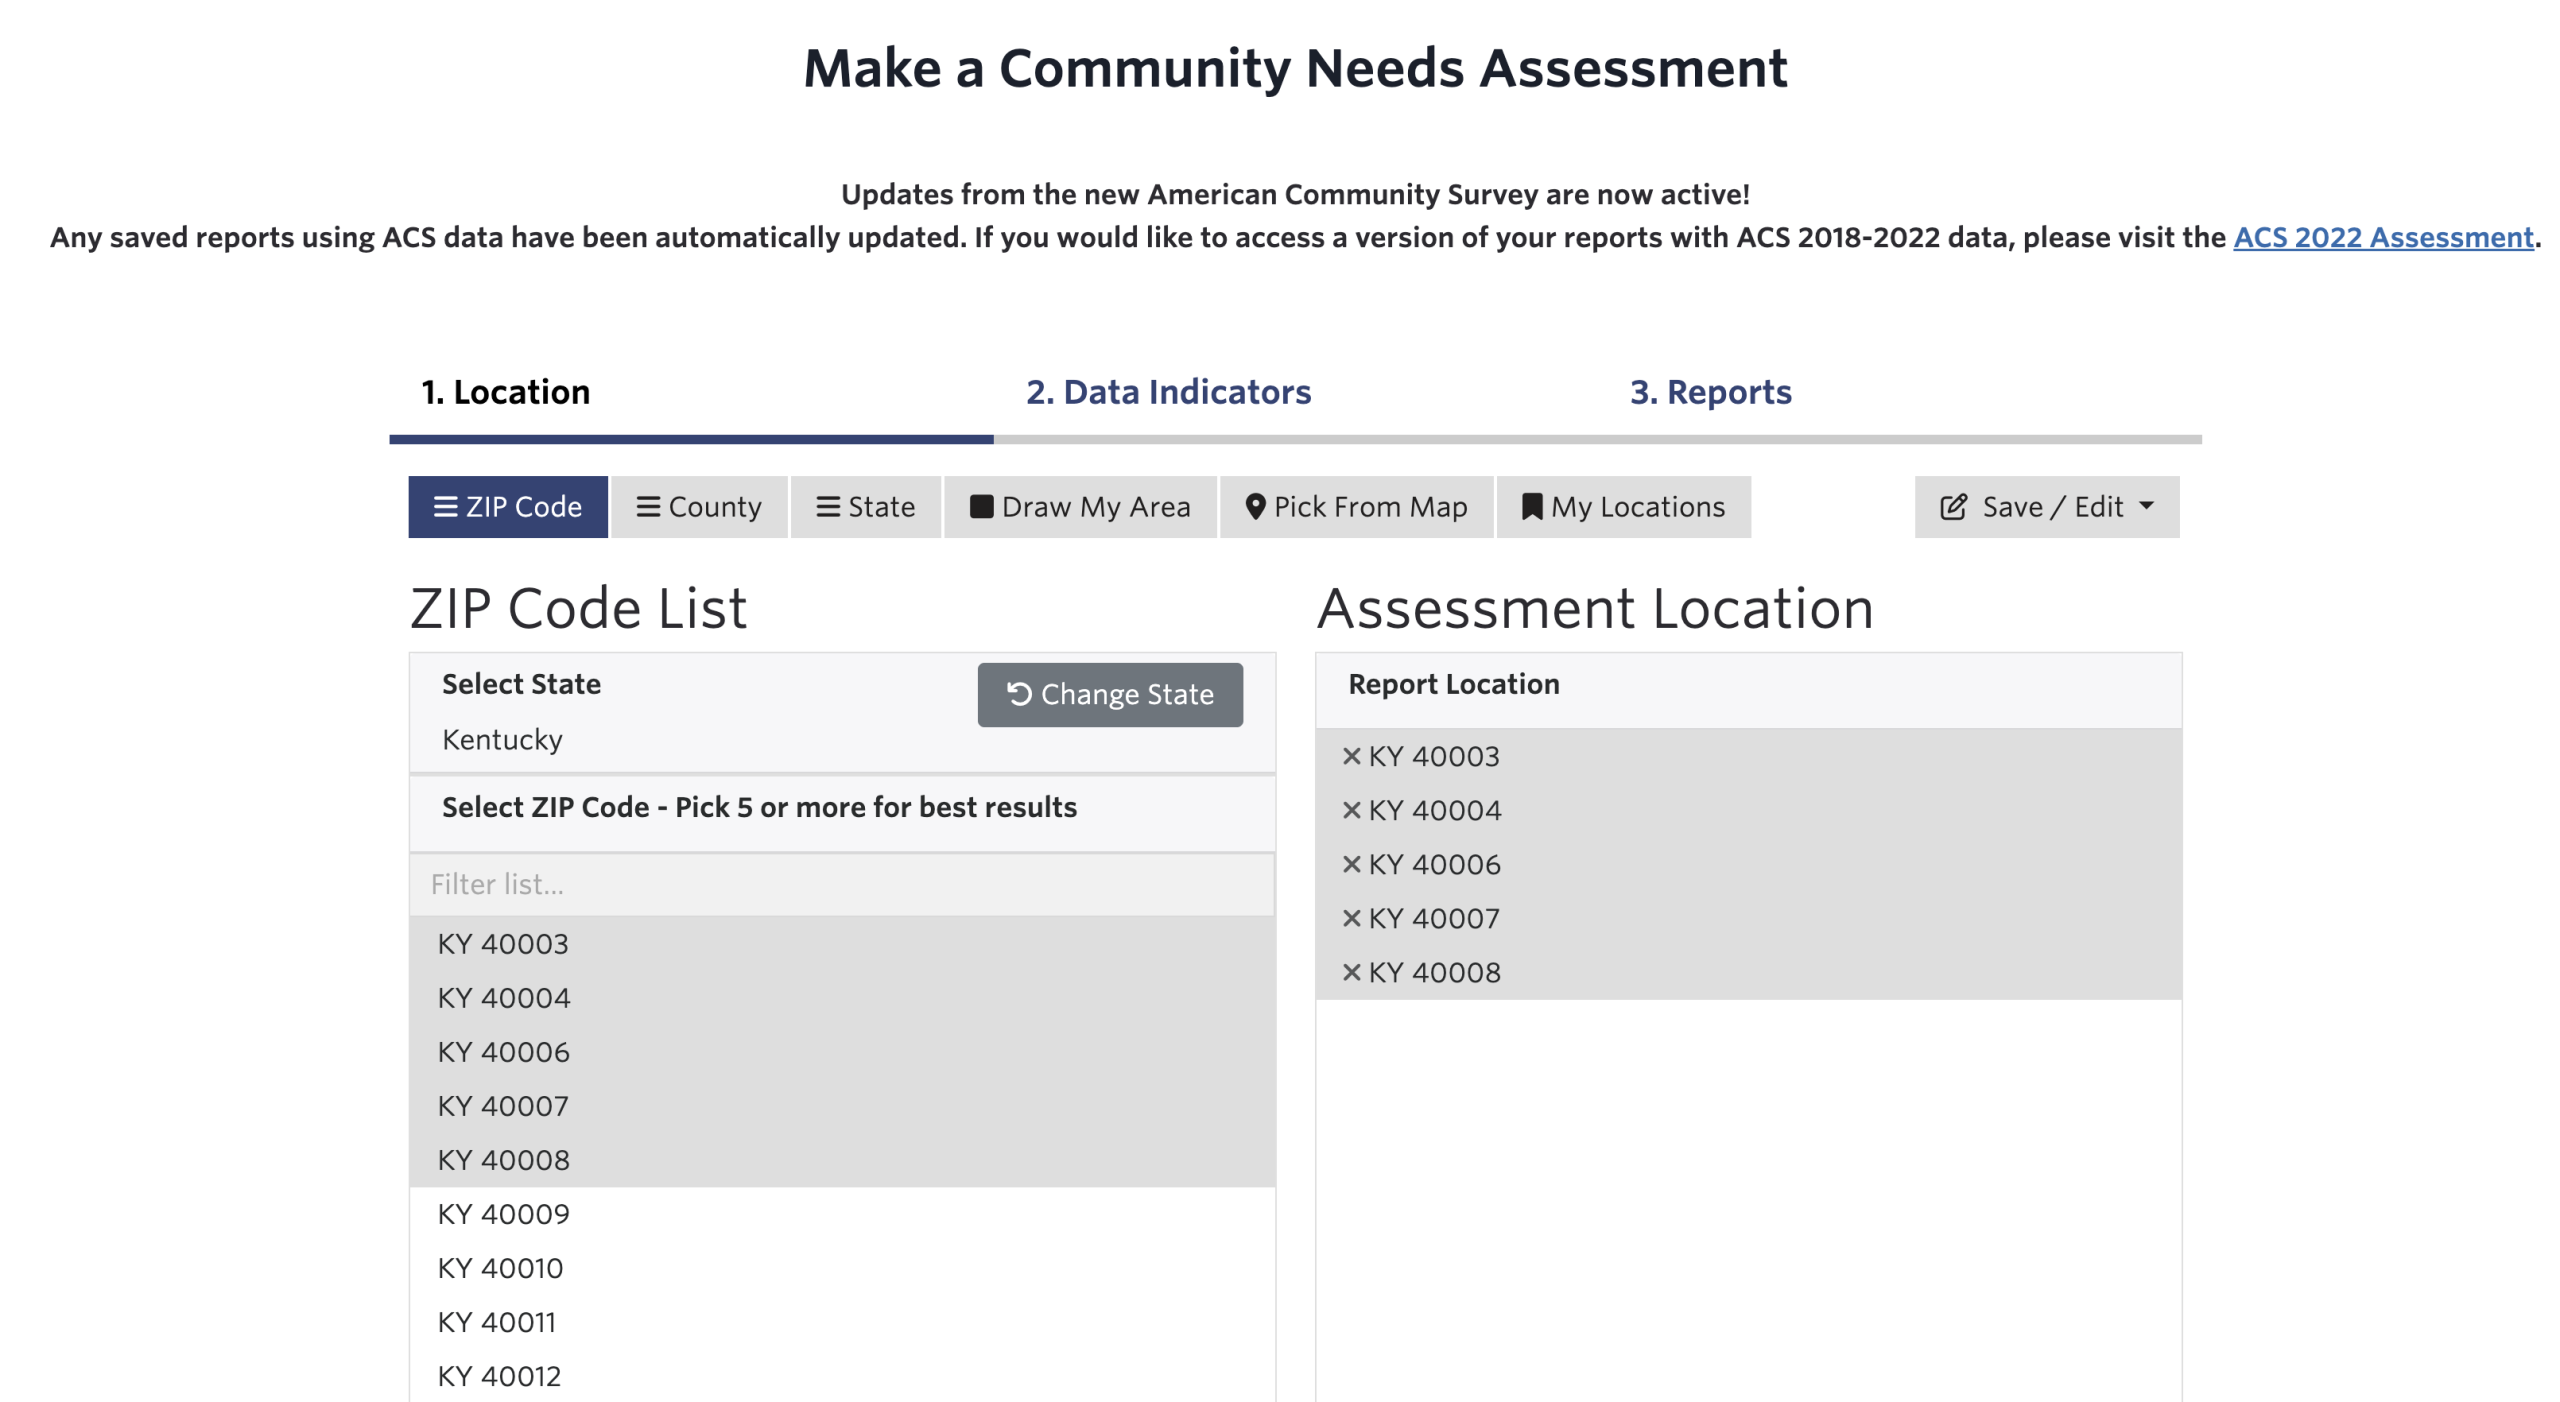
Select the ZIP Code location option. Then, select your state and ZIP Codes of interest.
After choosing all ZIP Codes, proceed to step 2 and choose your data indicators.
Step 2 – Select Your Data
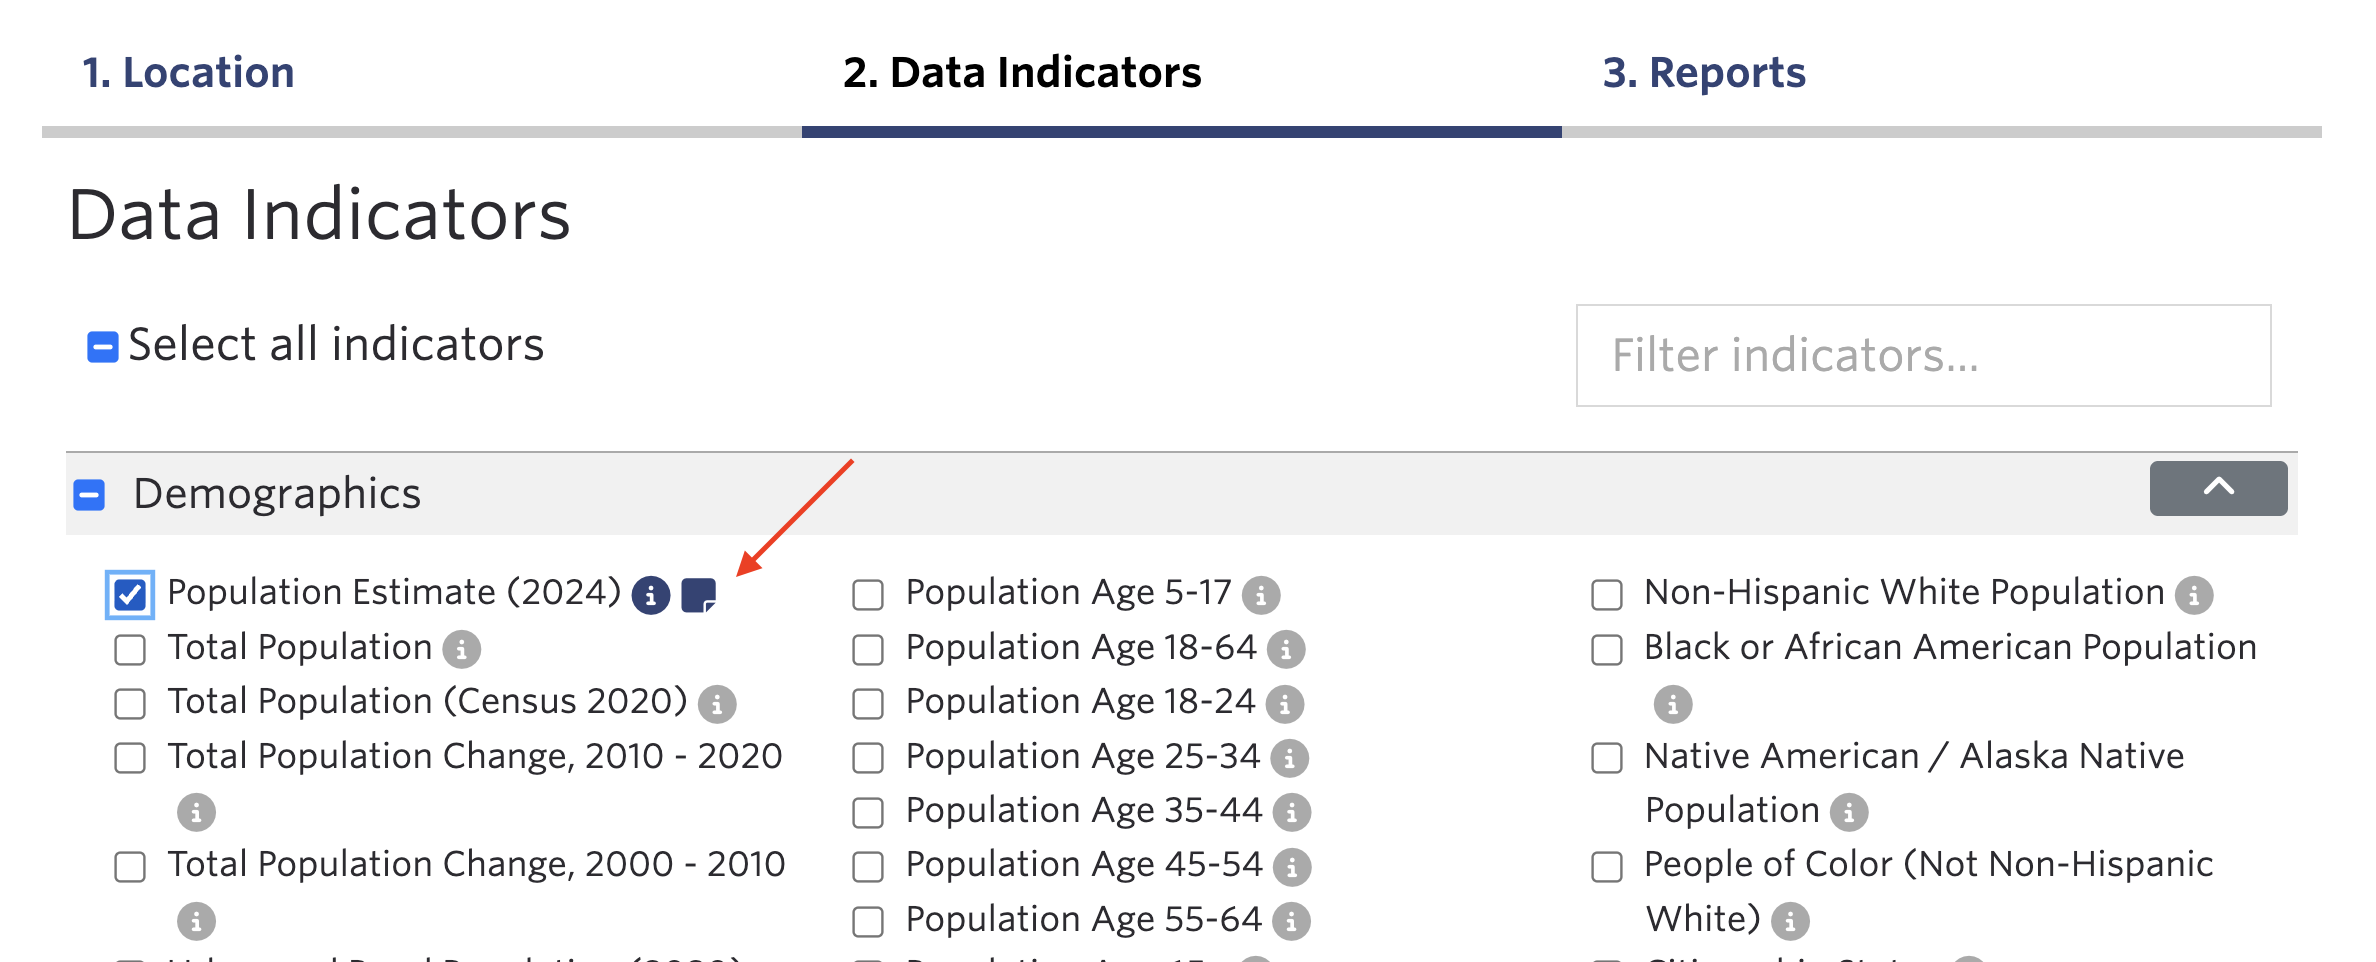
As a Premium Annual subscriber, you can select all available indicators for your Community Needs Assessment. However, it is important to consult the data notes to see if there are ZIP Code-level data limitations.
All indicators have an “i” icon to their right, representing data info. If this is the only icon next to the indicator, data is available at the individual ZIP Code level.
If a sticky note icon is also present, be sure to click on it to see any data limitations. Sticky notes could indicate that the indicator is only available as an aggregate of 5 or more ZIP Codes, or that the data is only available at the county or state level.
Step 3 – Explore Your ZIP-Code-Level Report
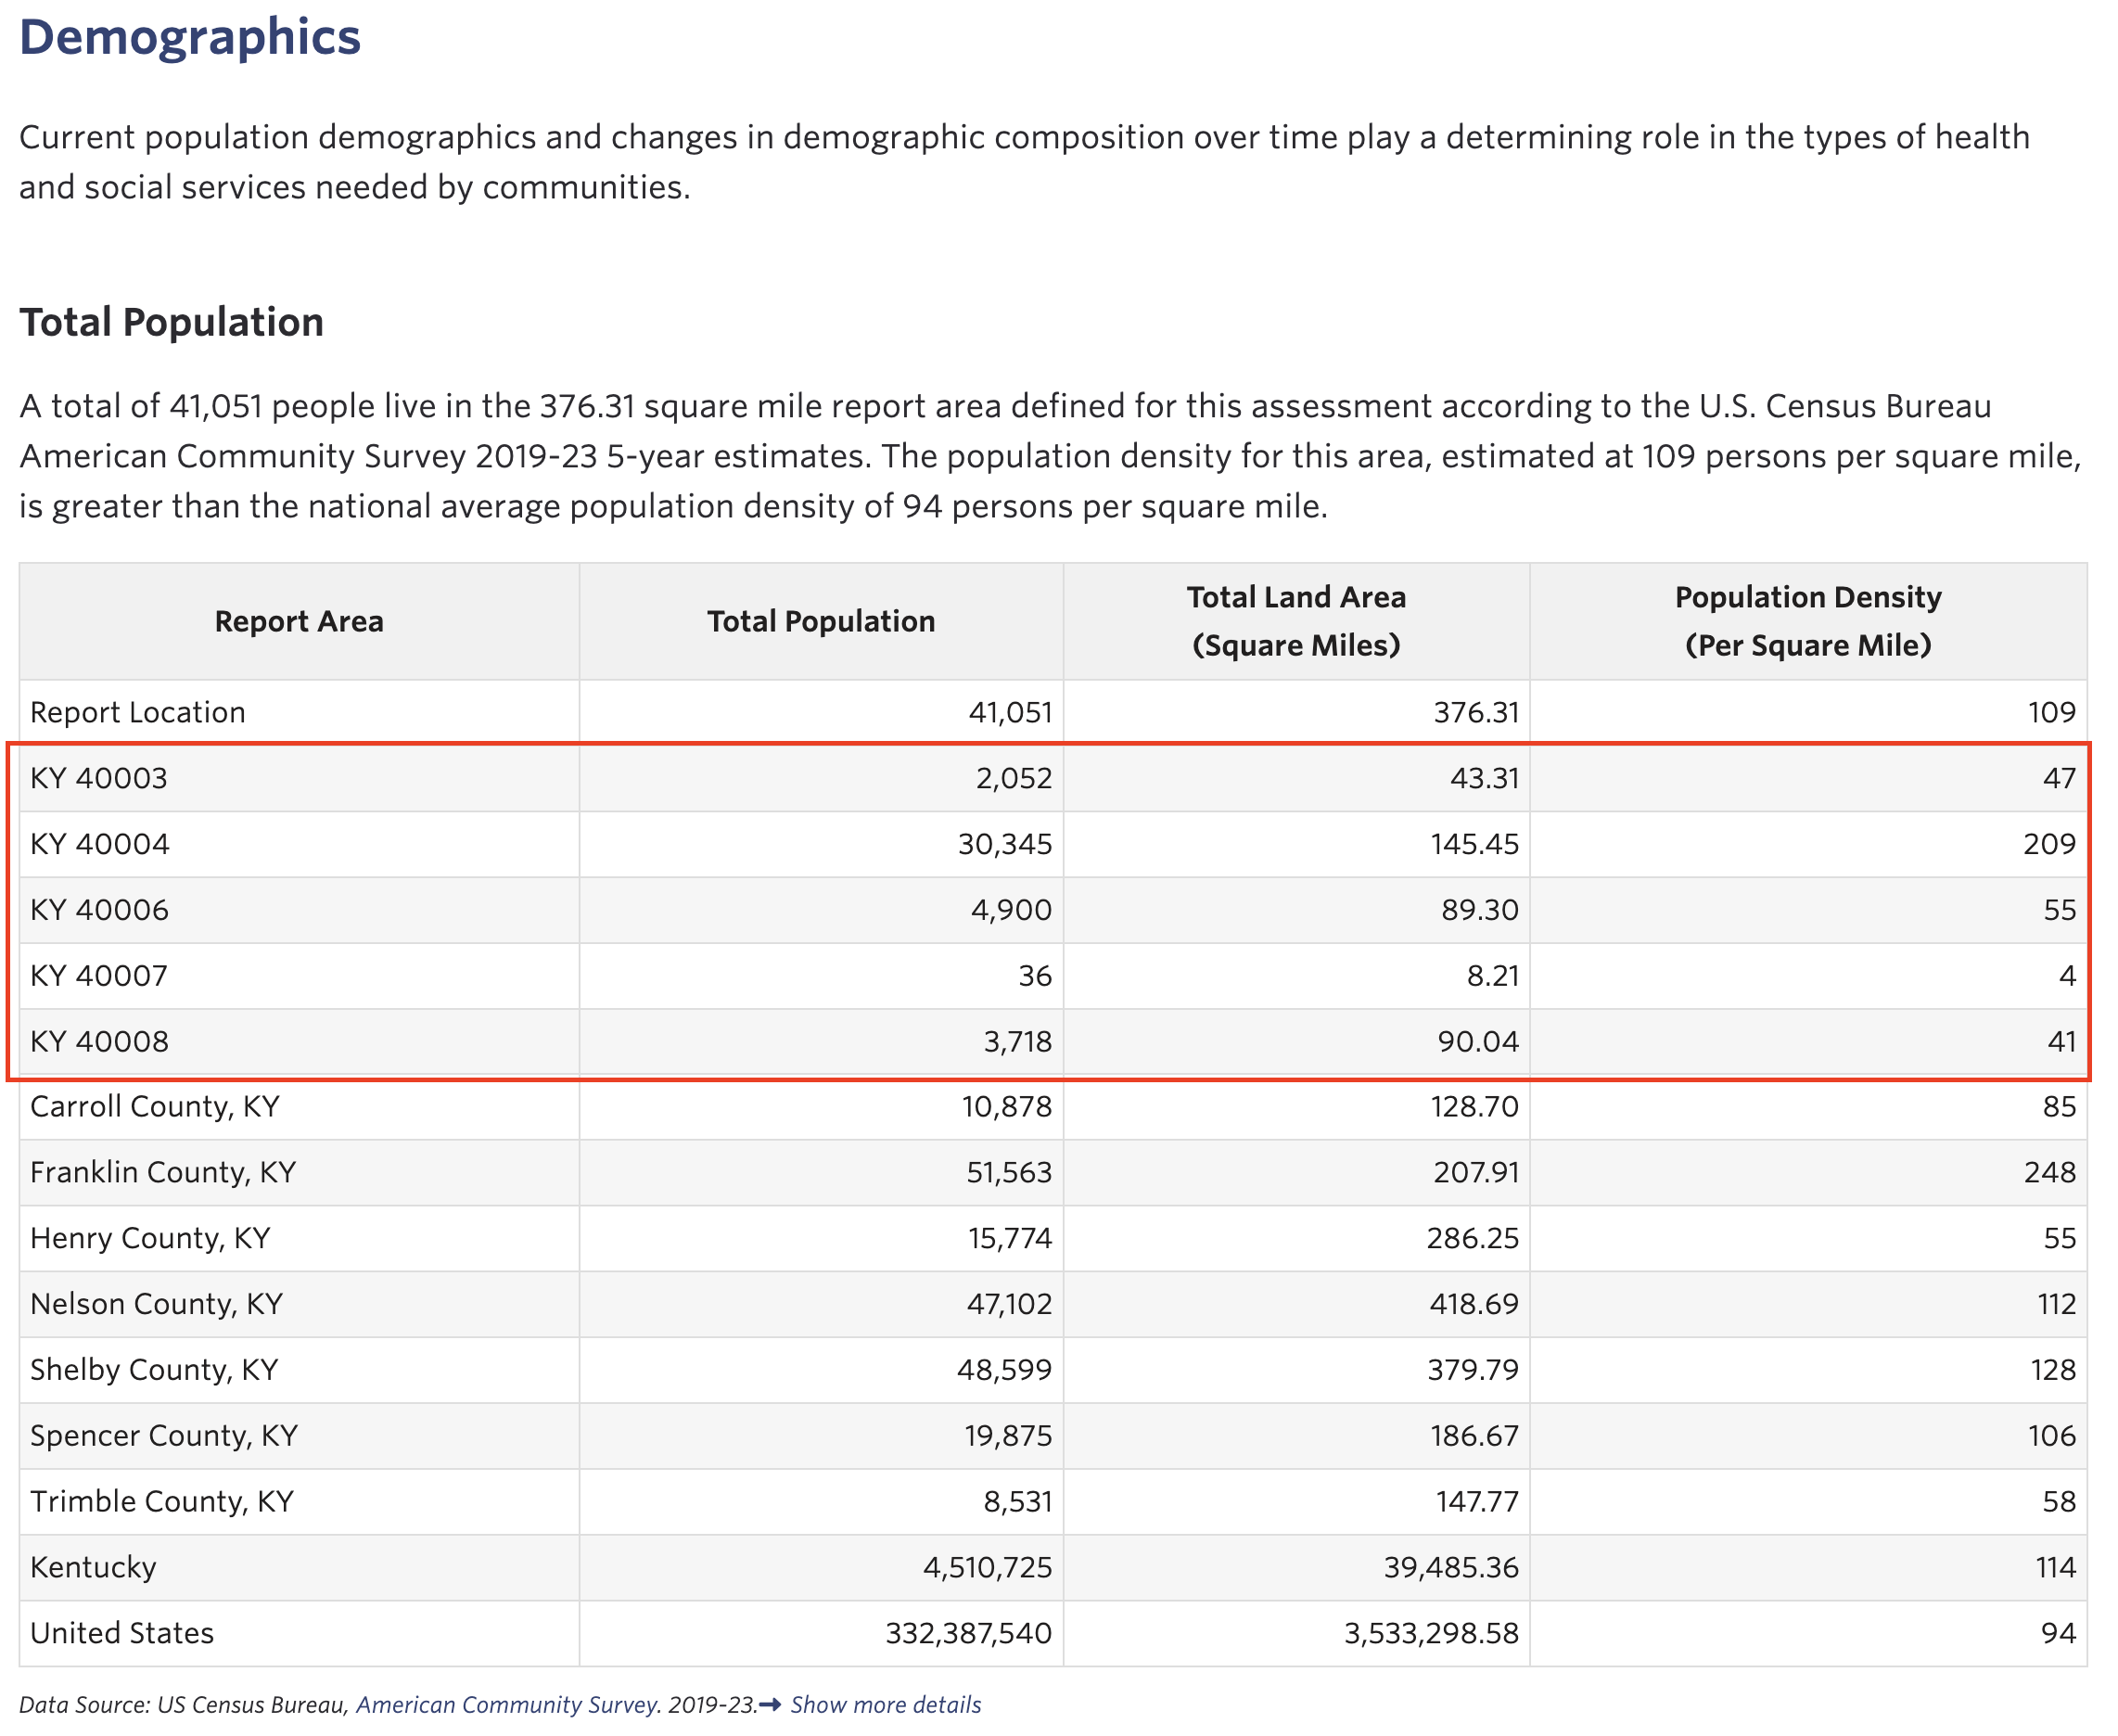
The tables in your report will now list data for each individual ZIP Code or aggregate of ZIP Codes within your selected service area.