How to Change Your Map Colors and Labels
Change your map colors and labels fonts in the SparkMap Map Room. All SparkMap visitors can access the color, symbol, and label changing tools.
Add a Map Layer
Go to Customize Map Symbols Settings
Change Map Colors or Symbols
Change Map Labels
Step 1 – Add a Map Layer
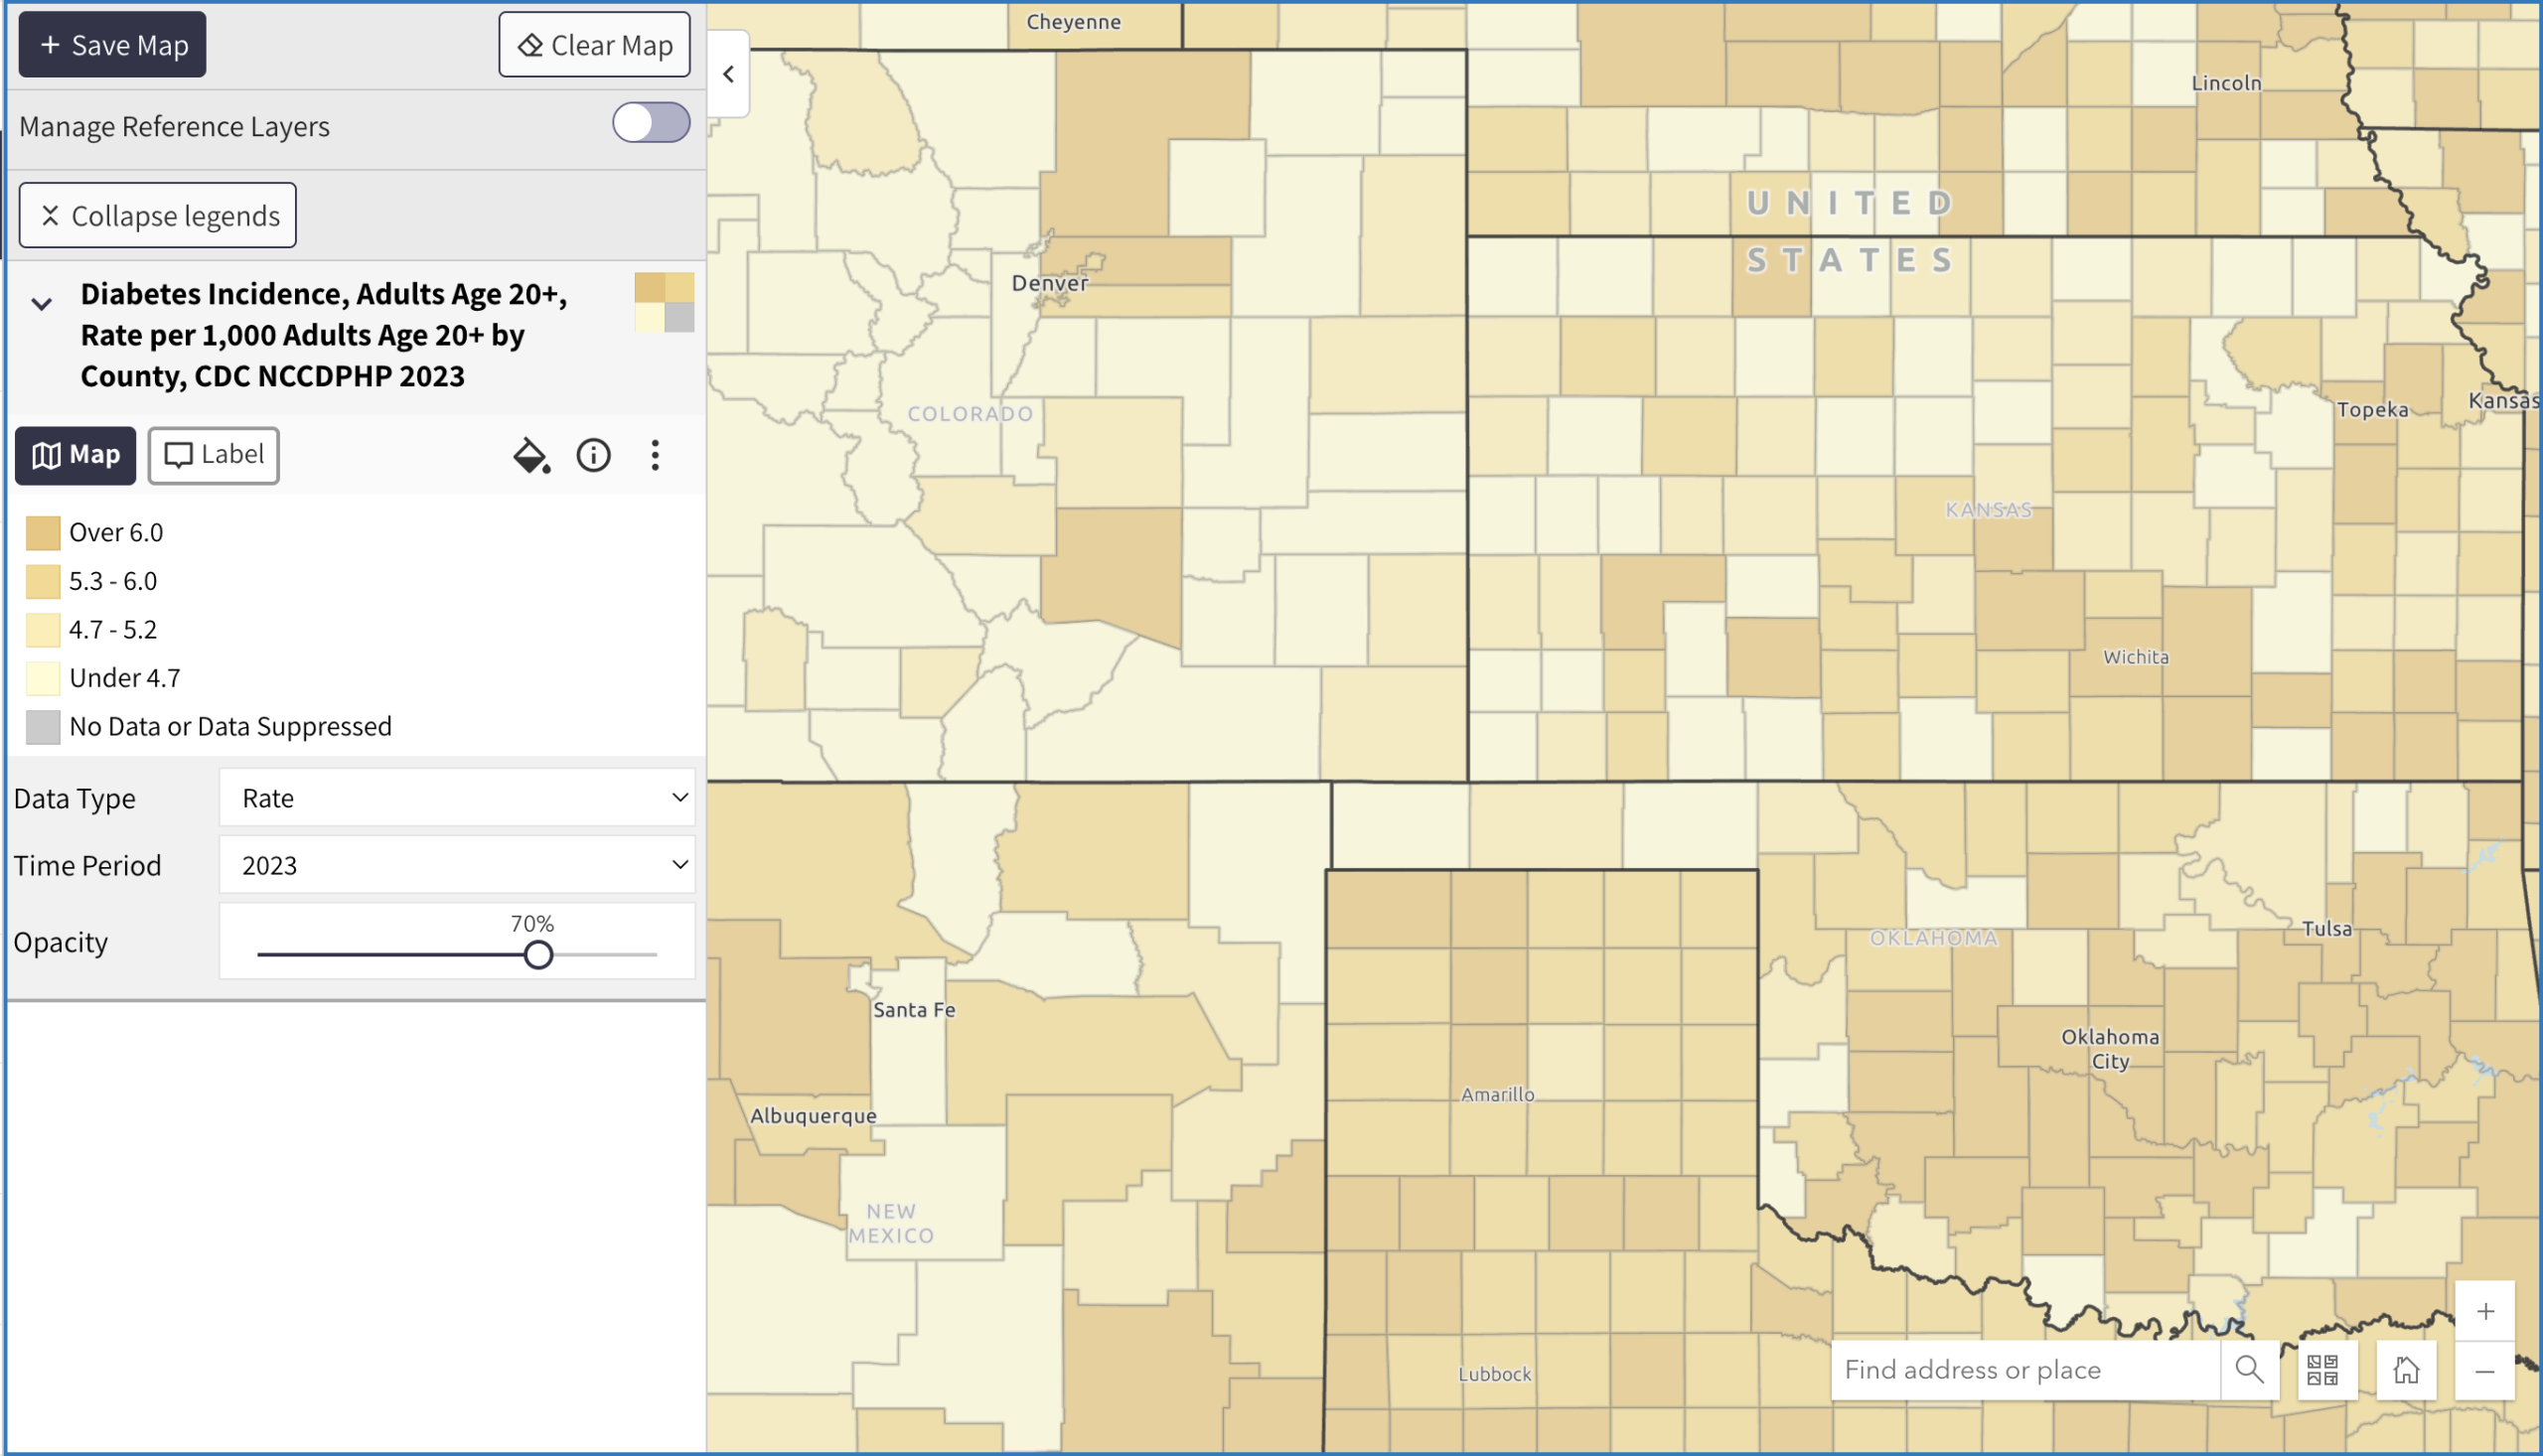
To use this tool, you must have a layer added to your map (Figure 1).
For instructions on how to find and add map layers, see How to Make a Map.
Step 2 – Go to Customize Map Symbols Settings
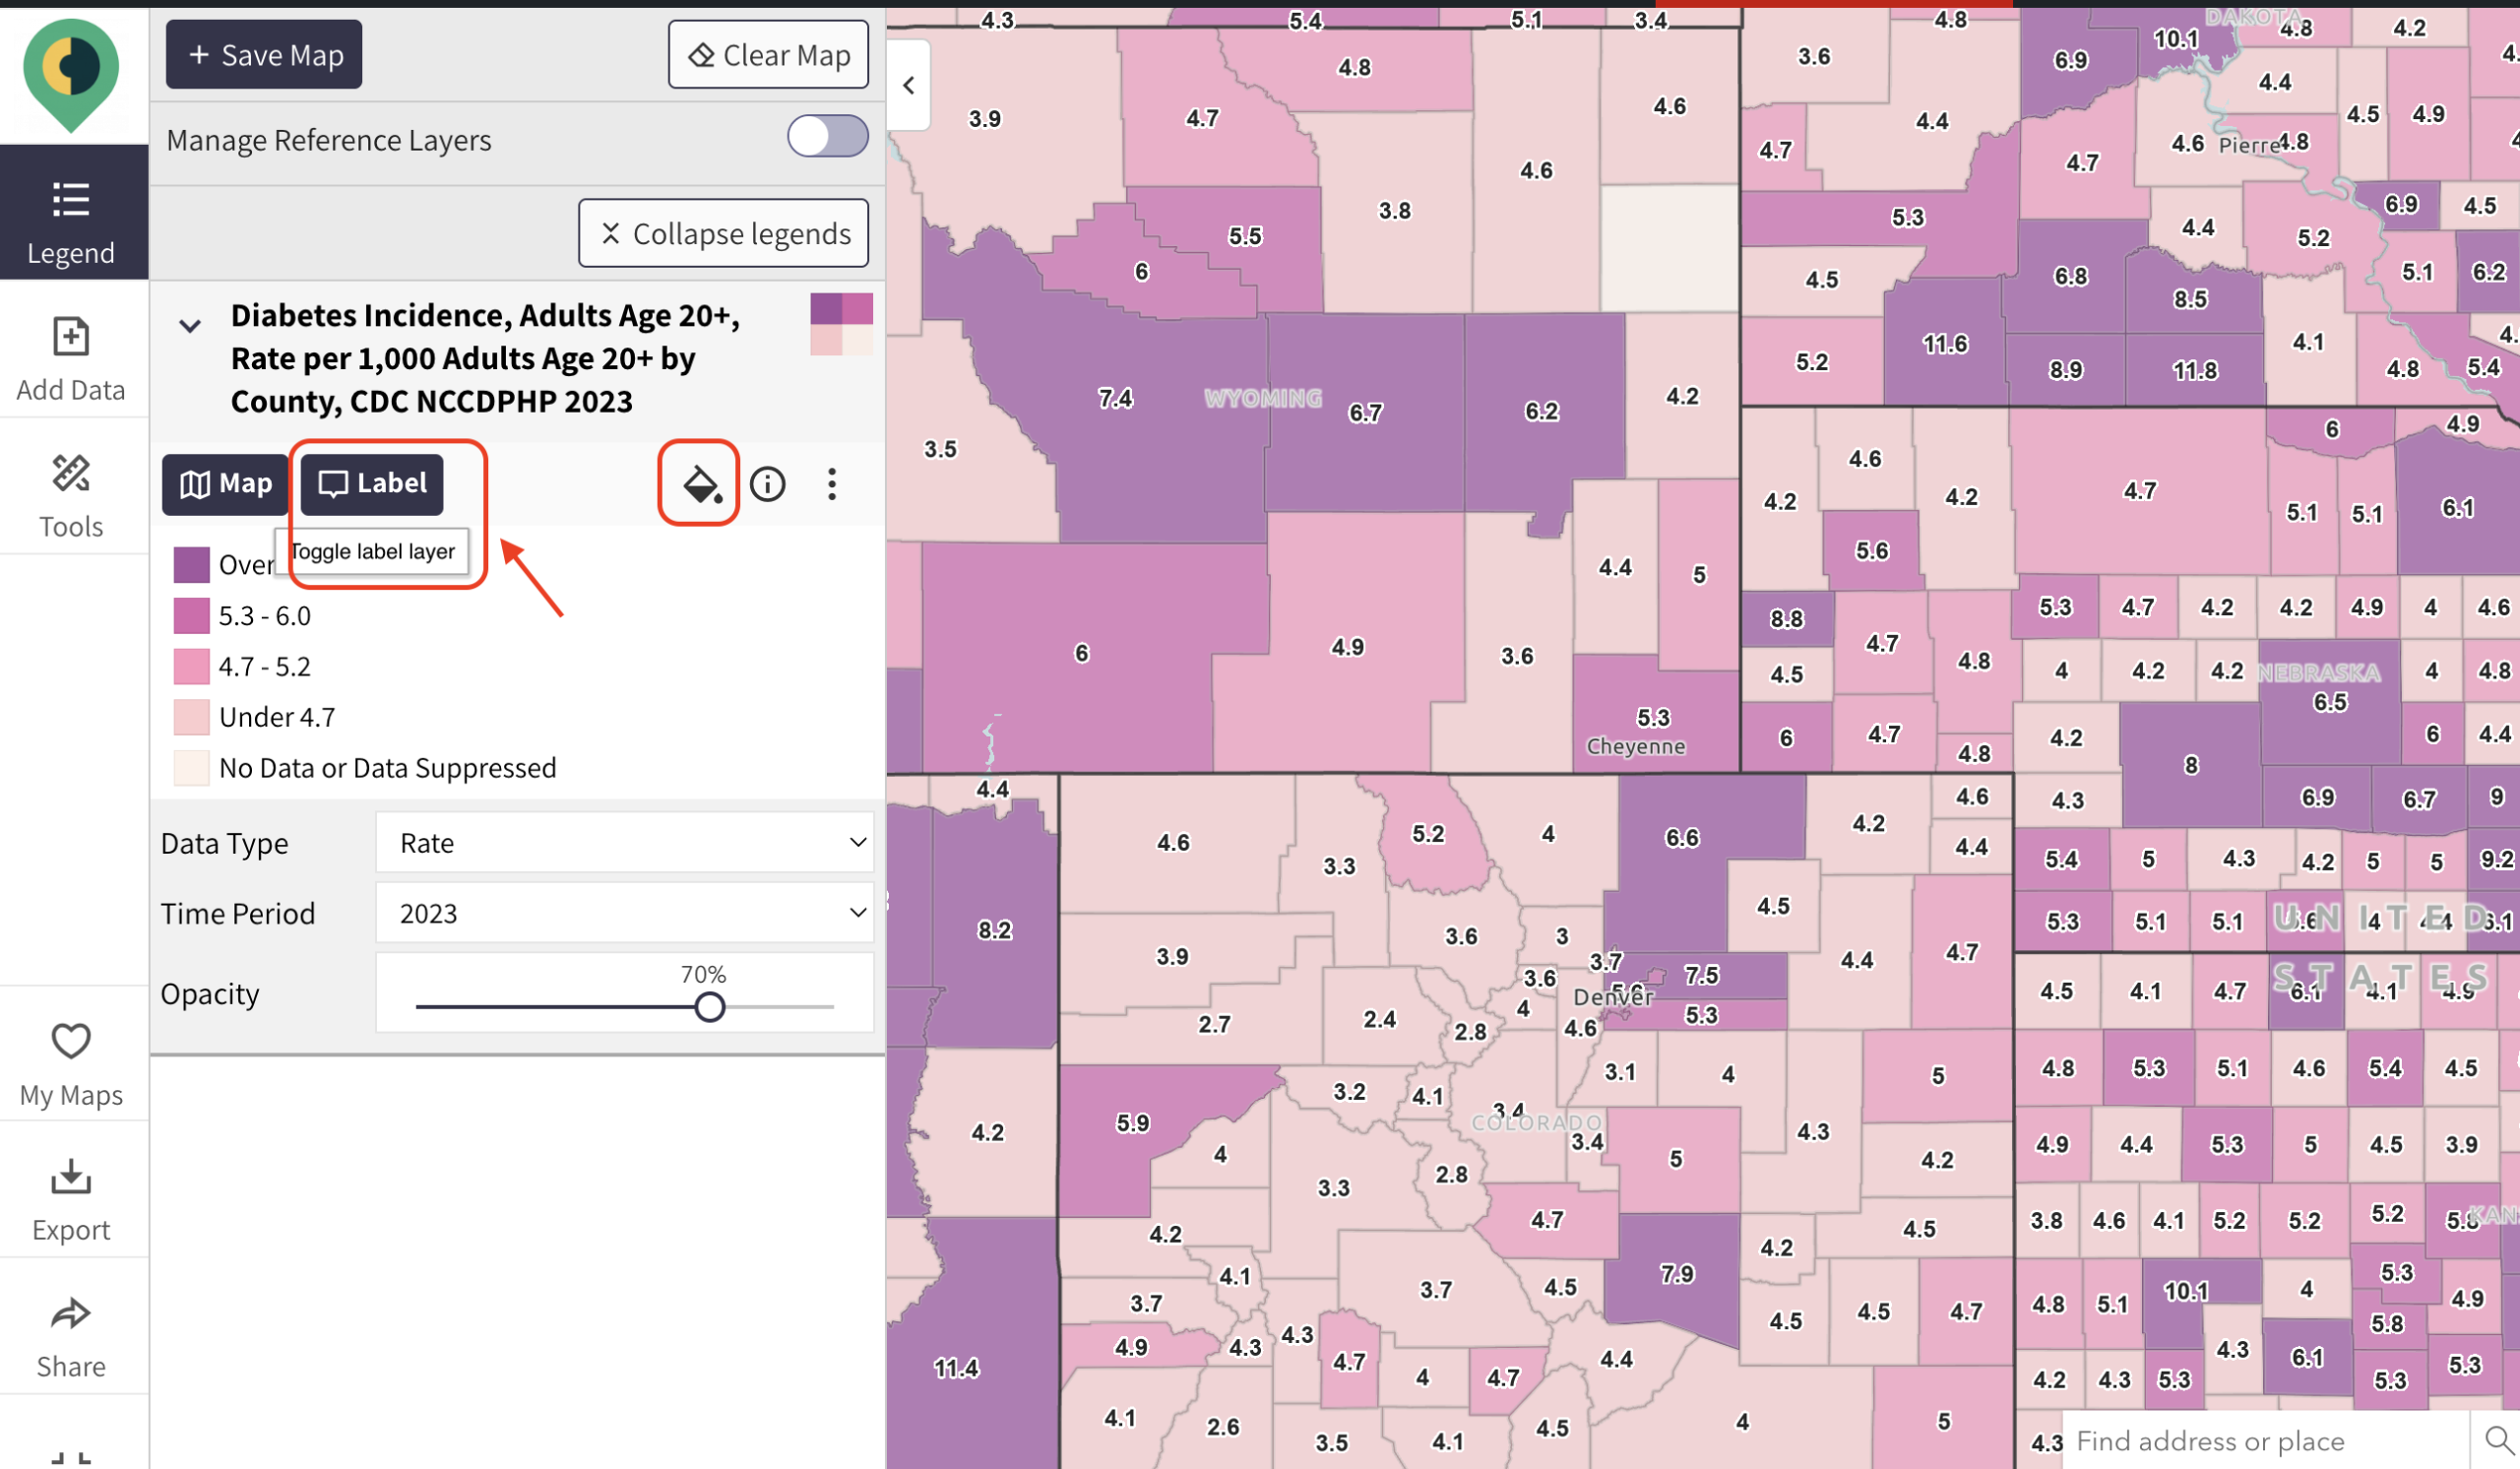
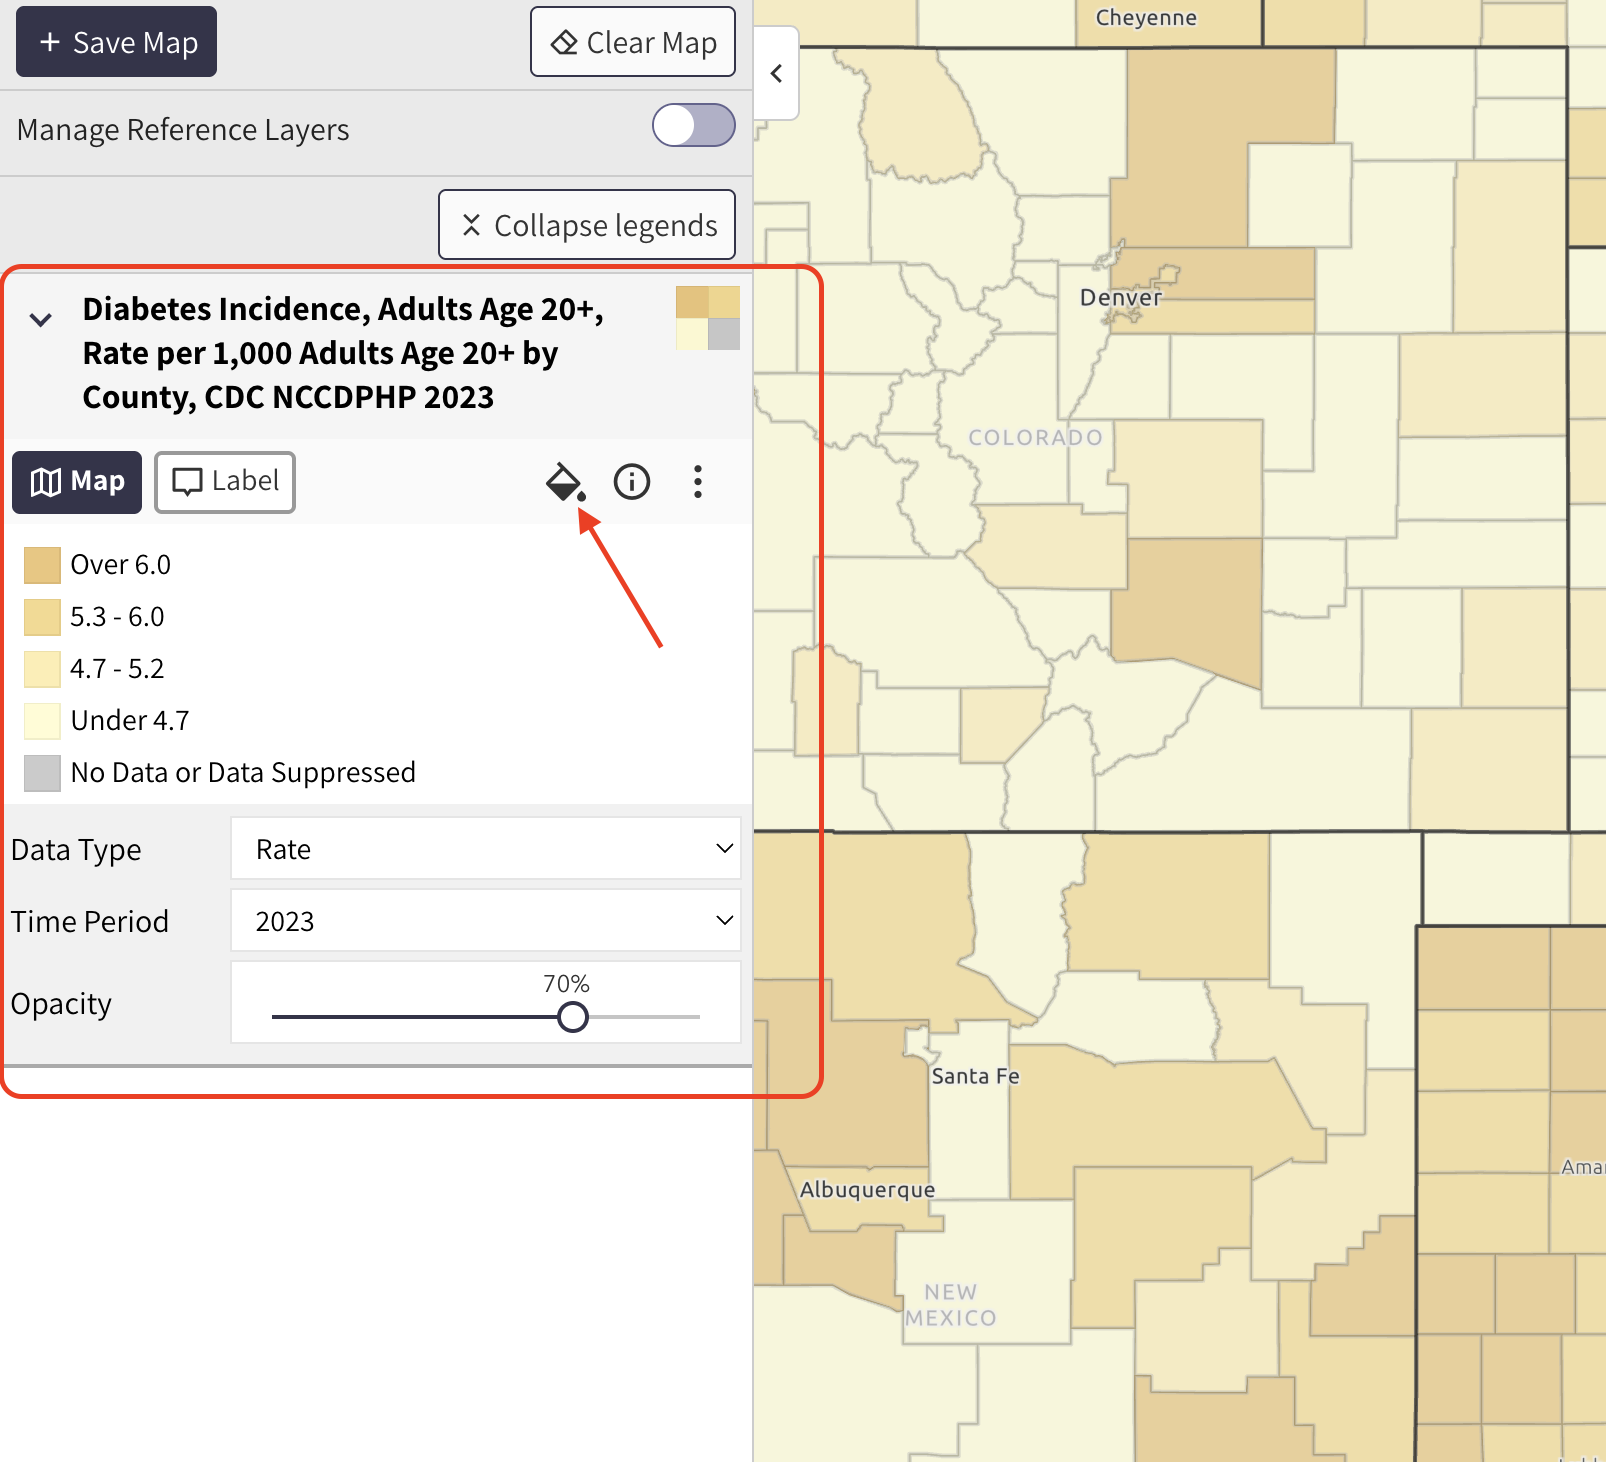
In your map’s legend, select the paint bucket icon (Figure 2). You can also access this tool via the Tools button on the left side of the Map Room.
The Customize Map Symbols settings page will then appear (Figure 3).
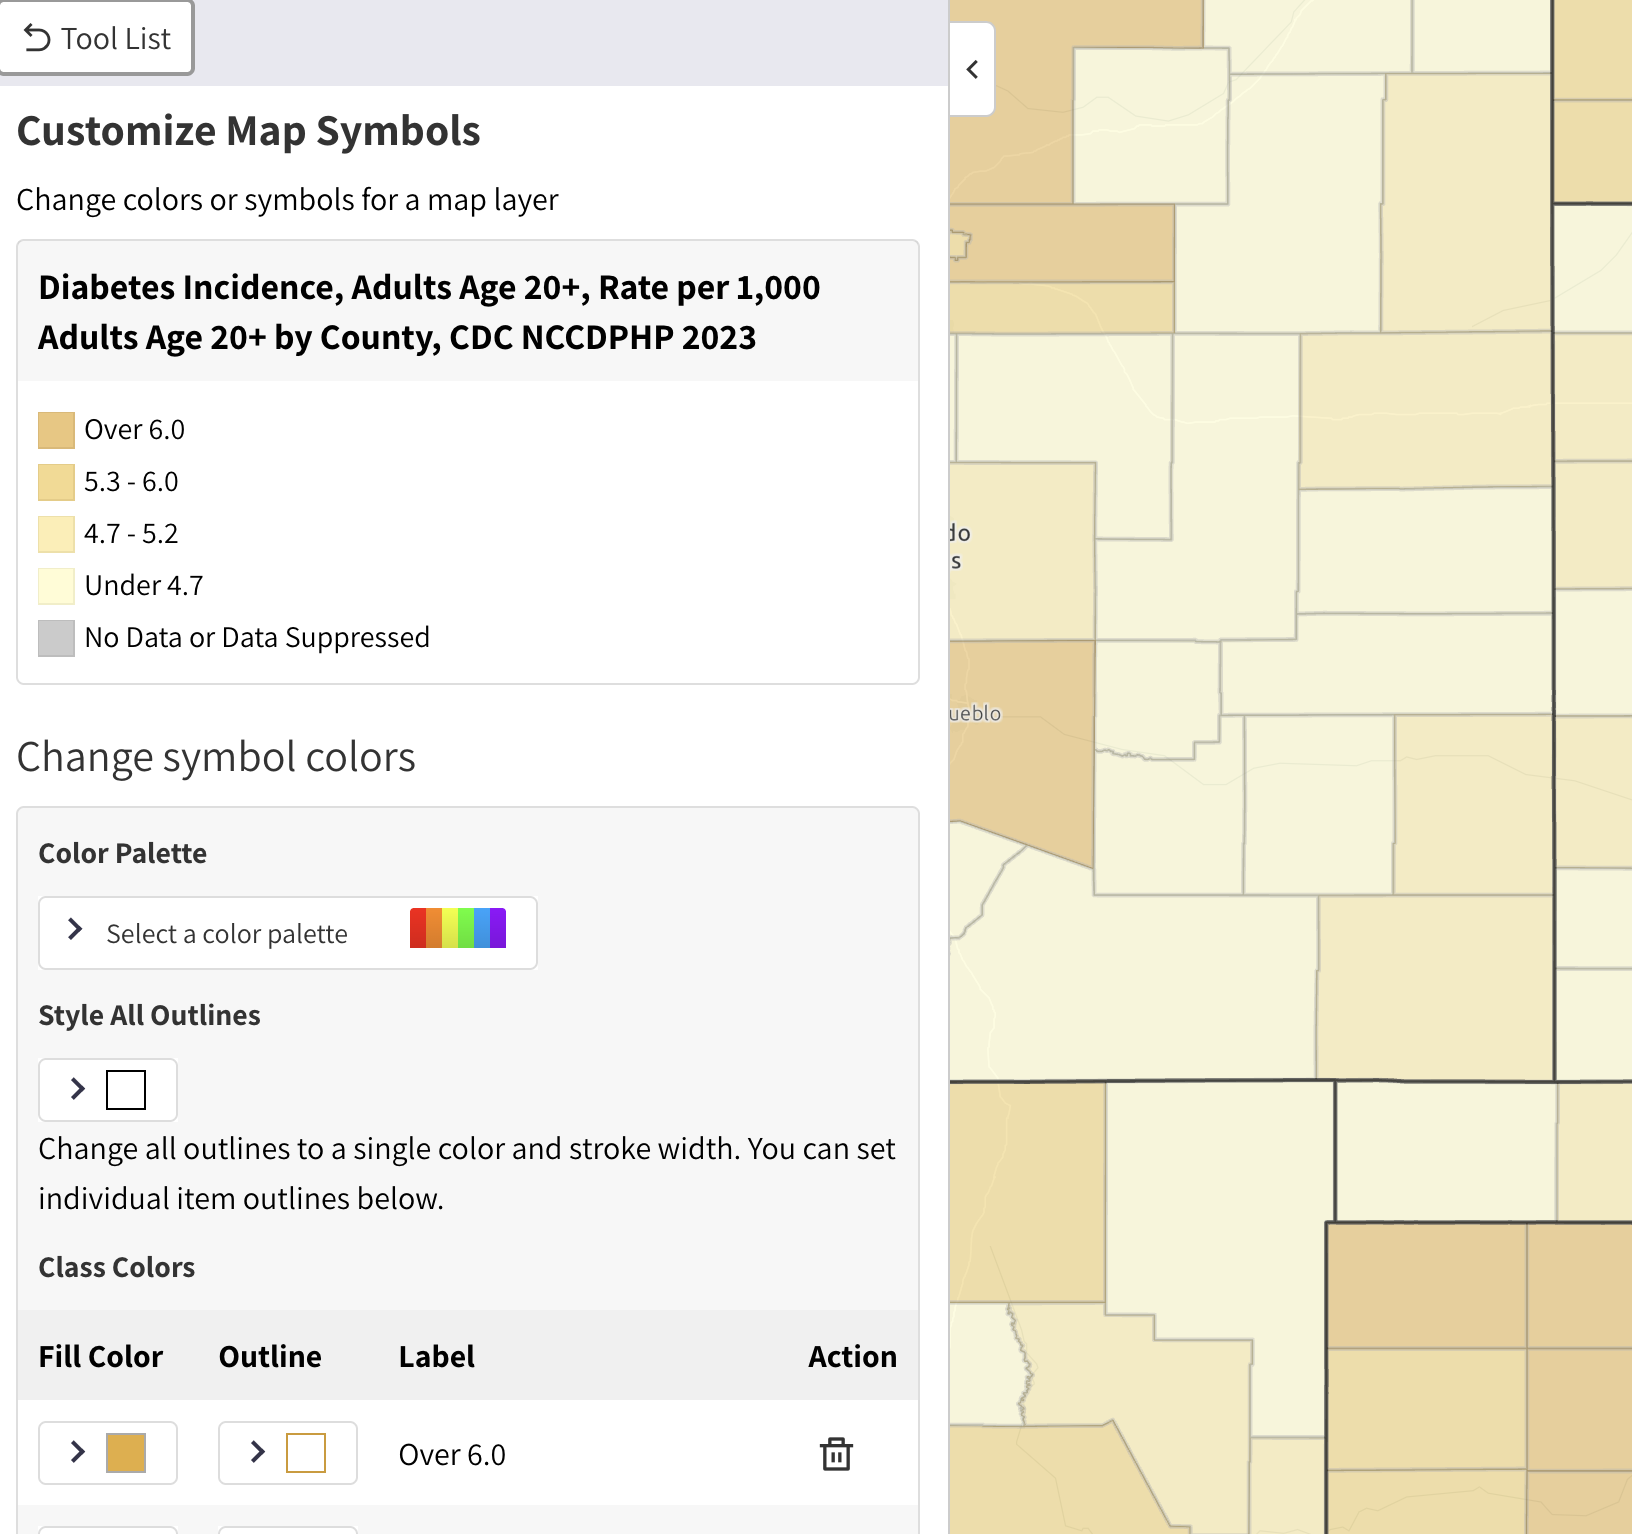
Step 3 – Change Map Colors or Symbols
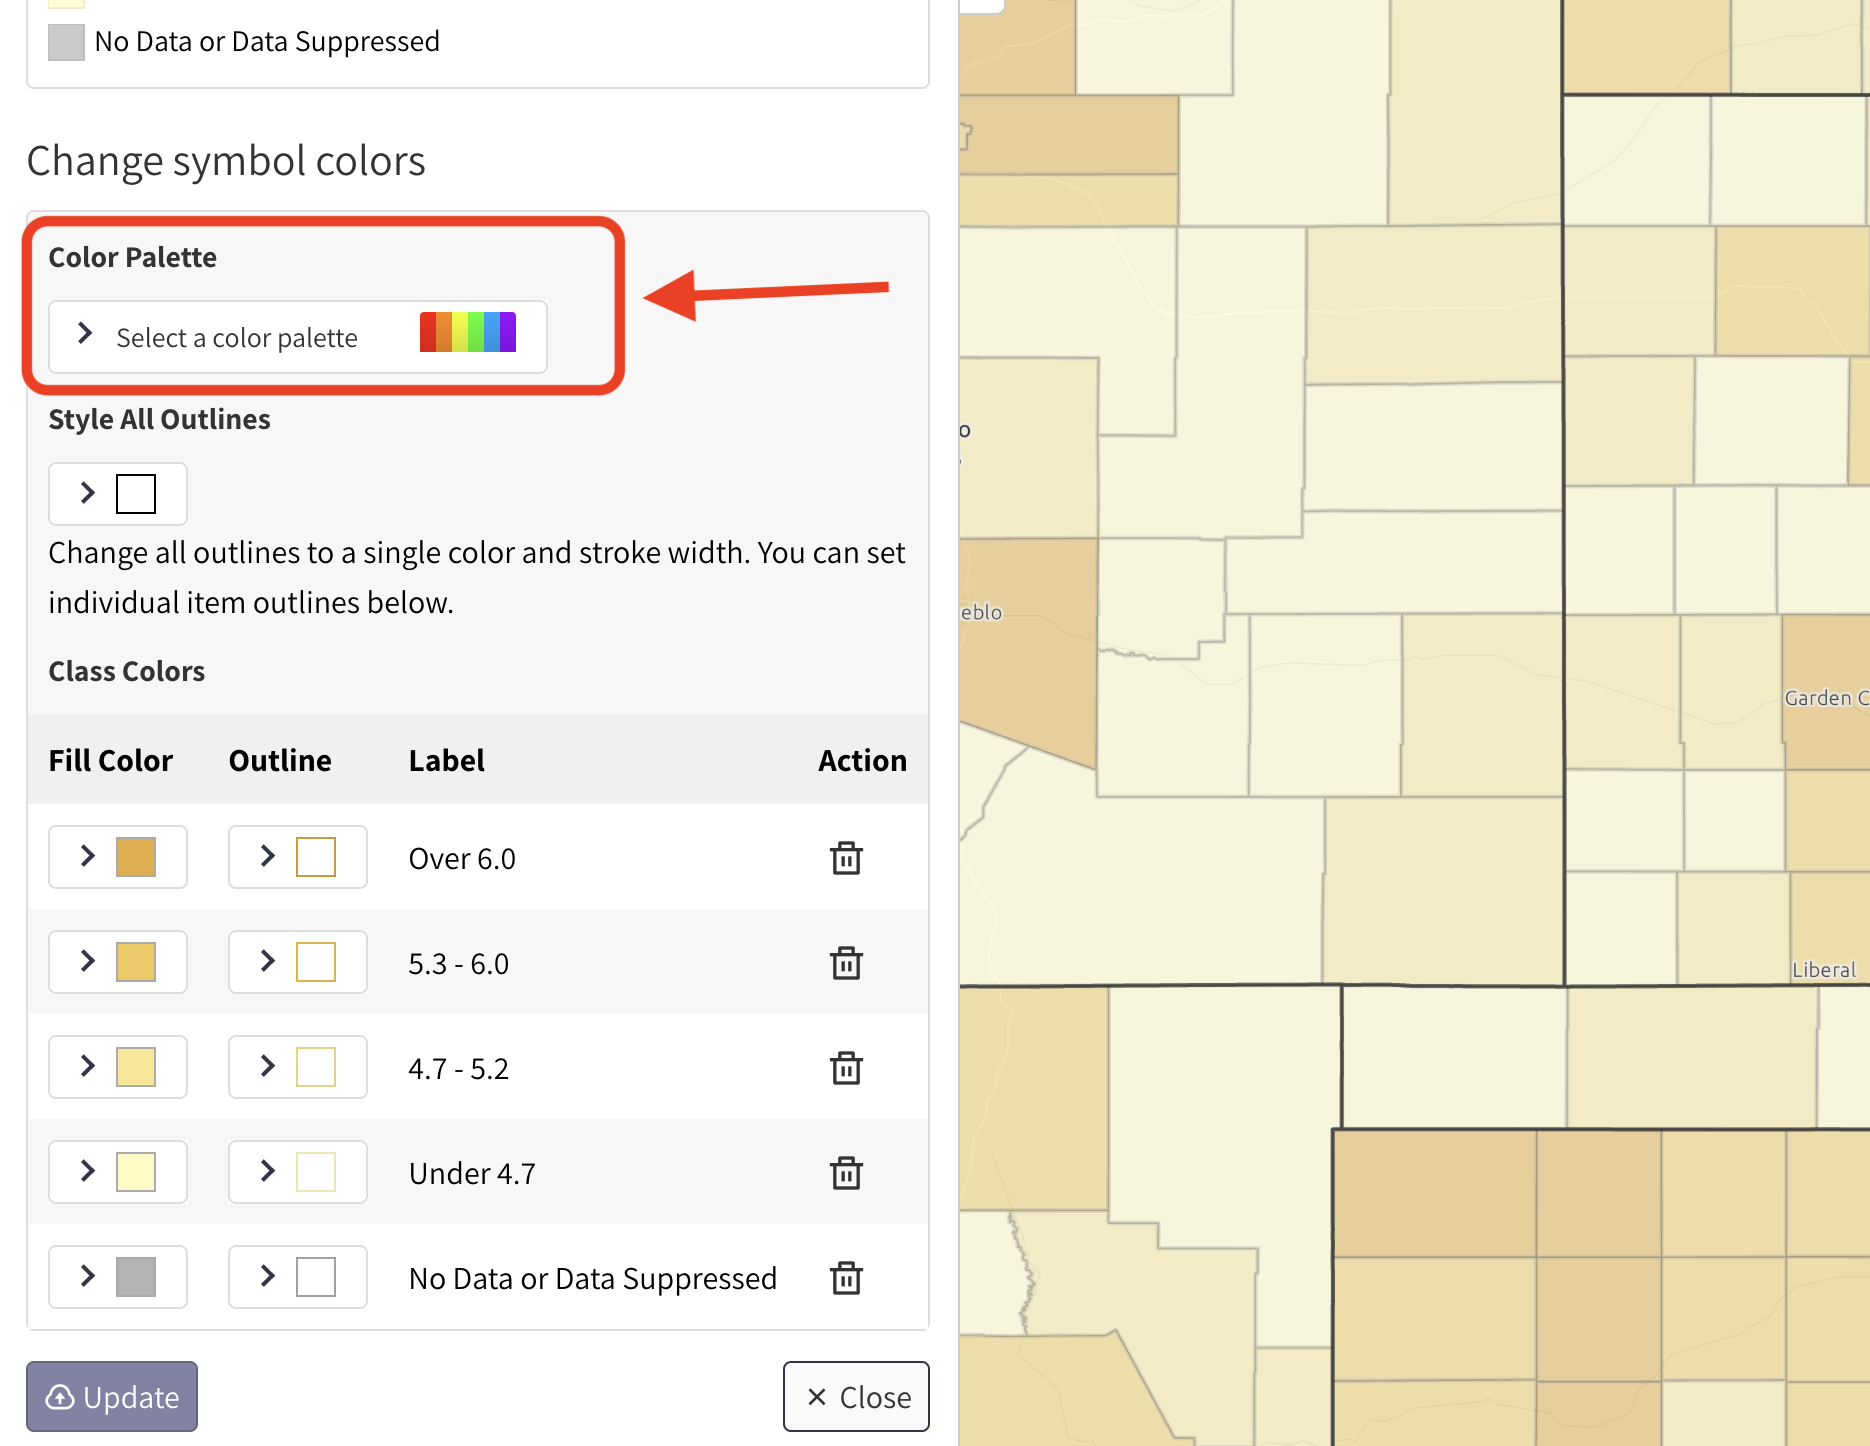
Scroll down to the “Change symbol colors” section. To change the entire color palette for your map, click the color palette dropdown (Figure 4, circled in red).
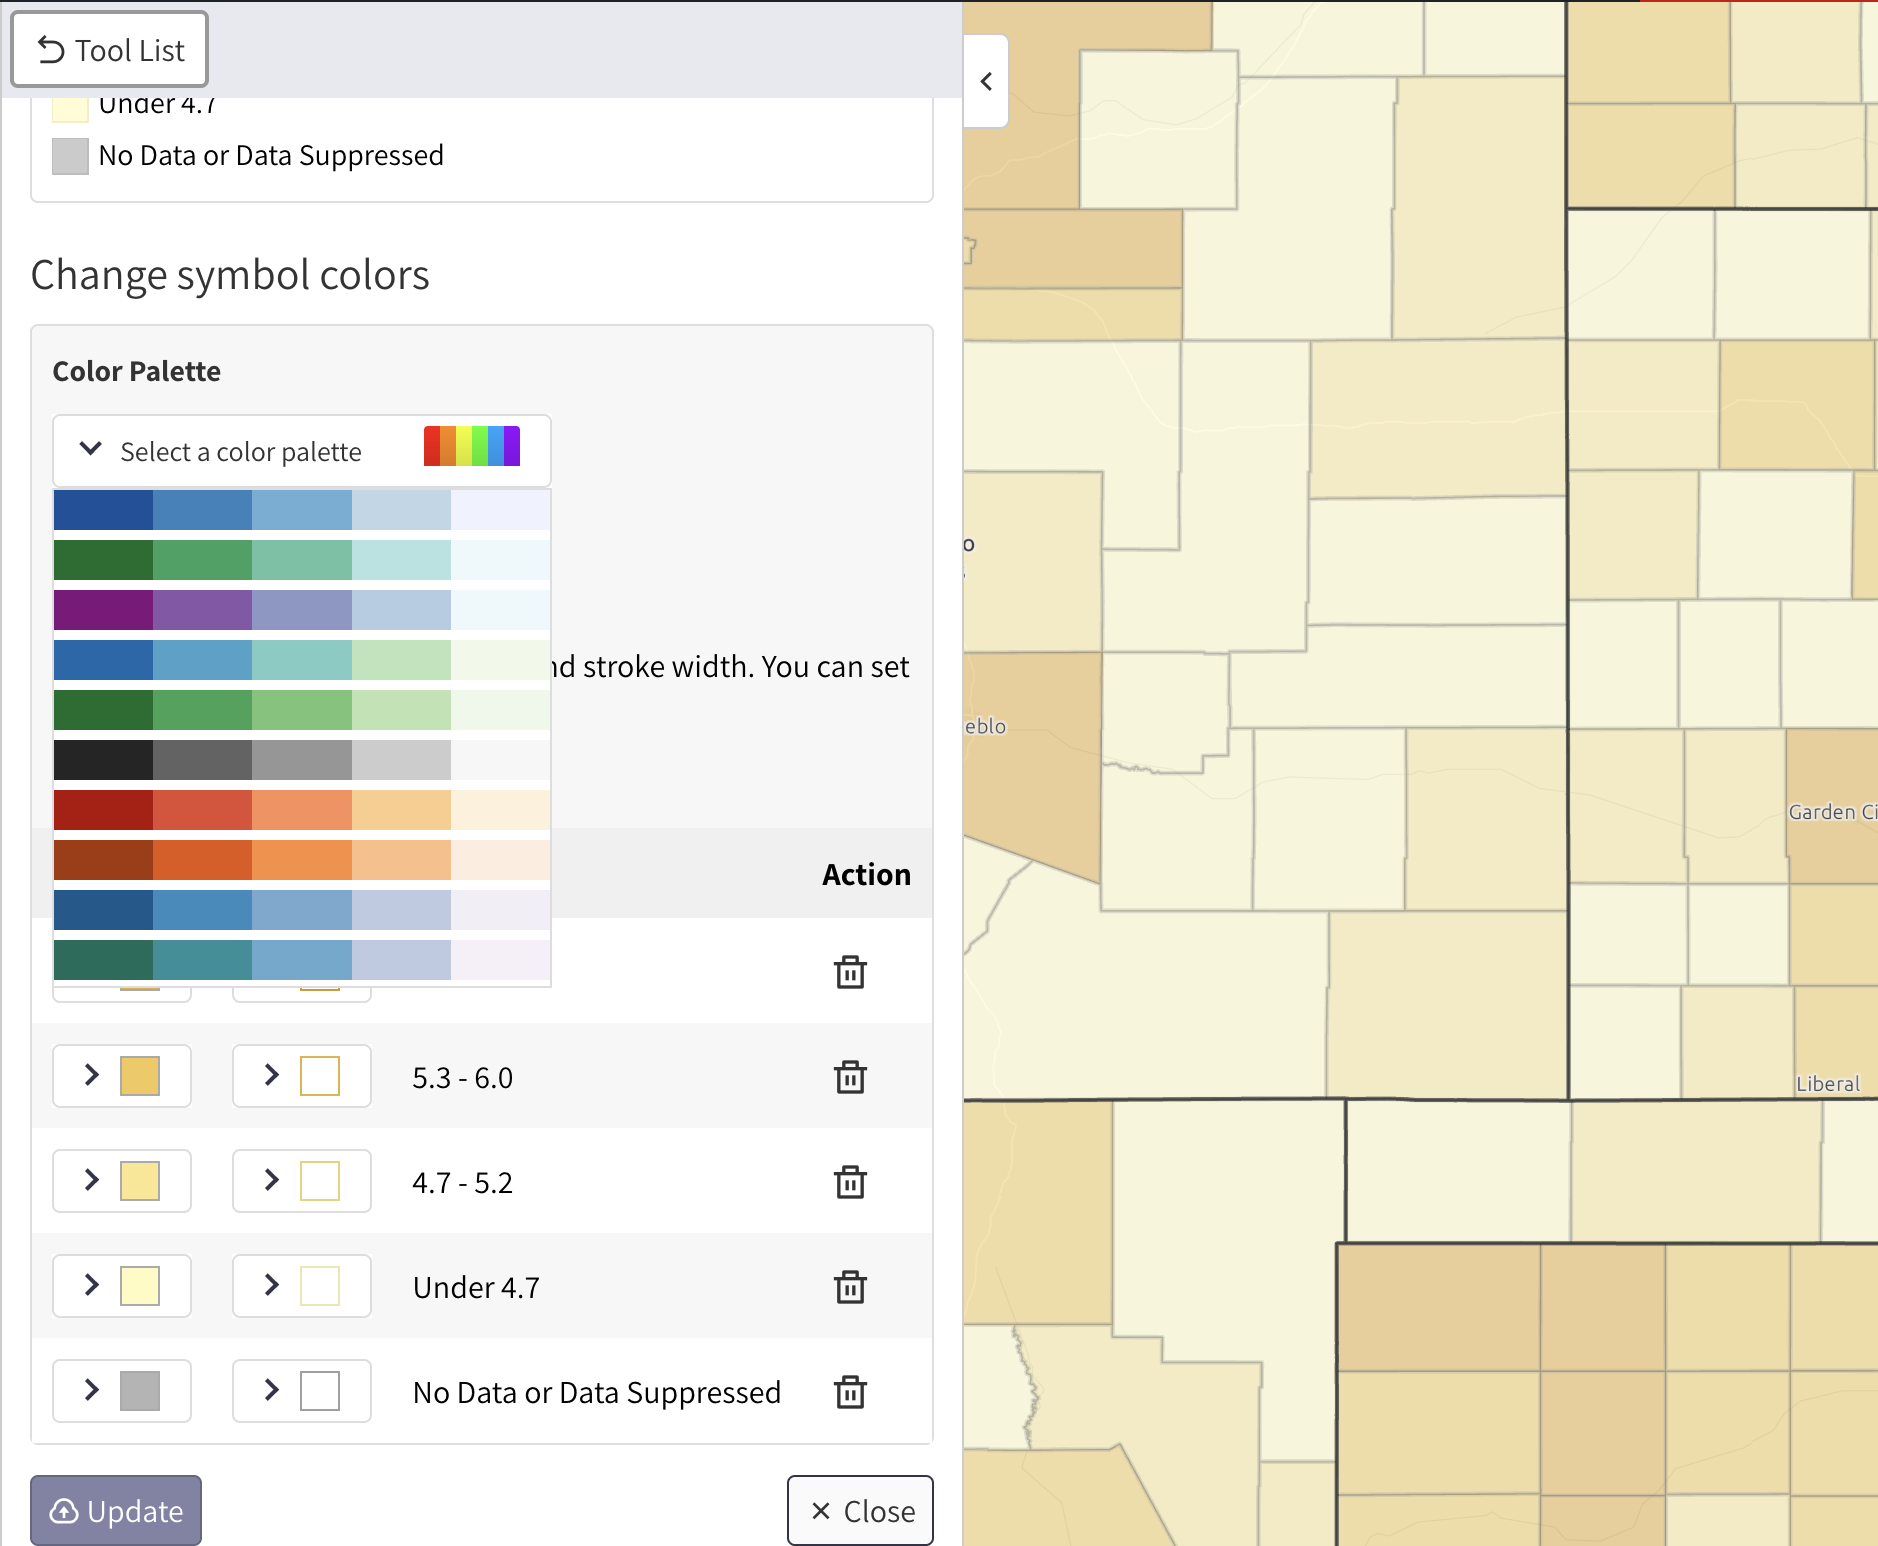
A list of color options will appear in a dropdown (Figure 5). Click a color palette to select it.
To edit an individual color from your palette, use the individual color squares beside each map field name (Figure 6, in red).

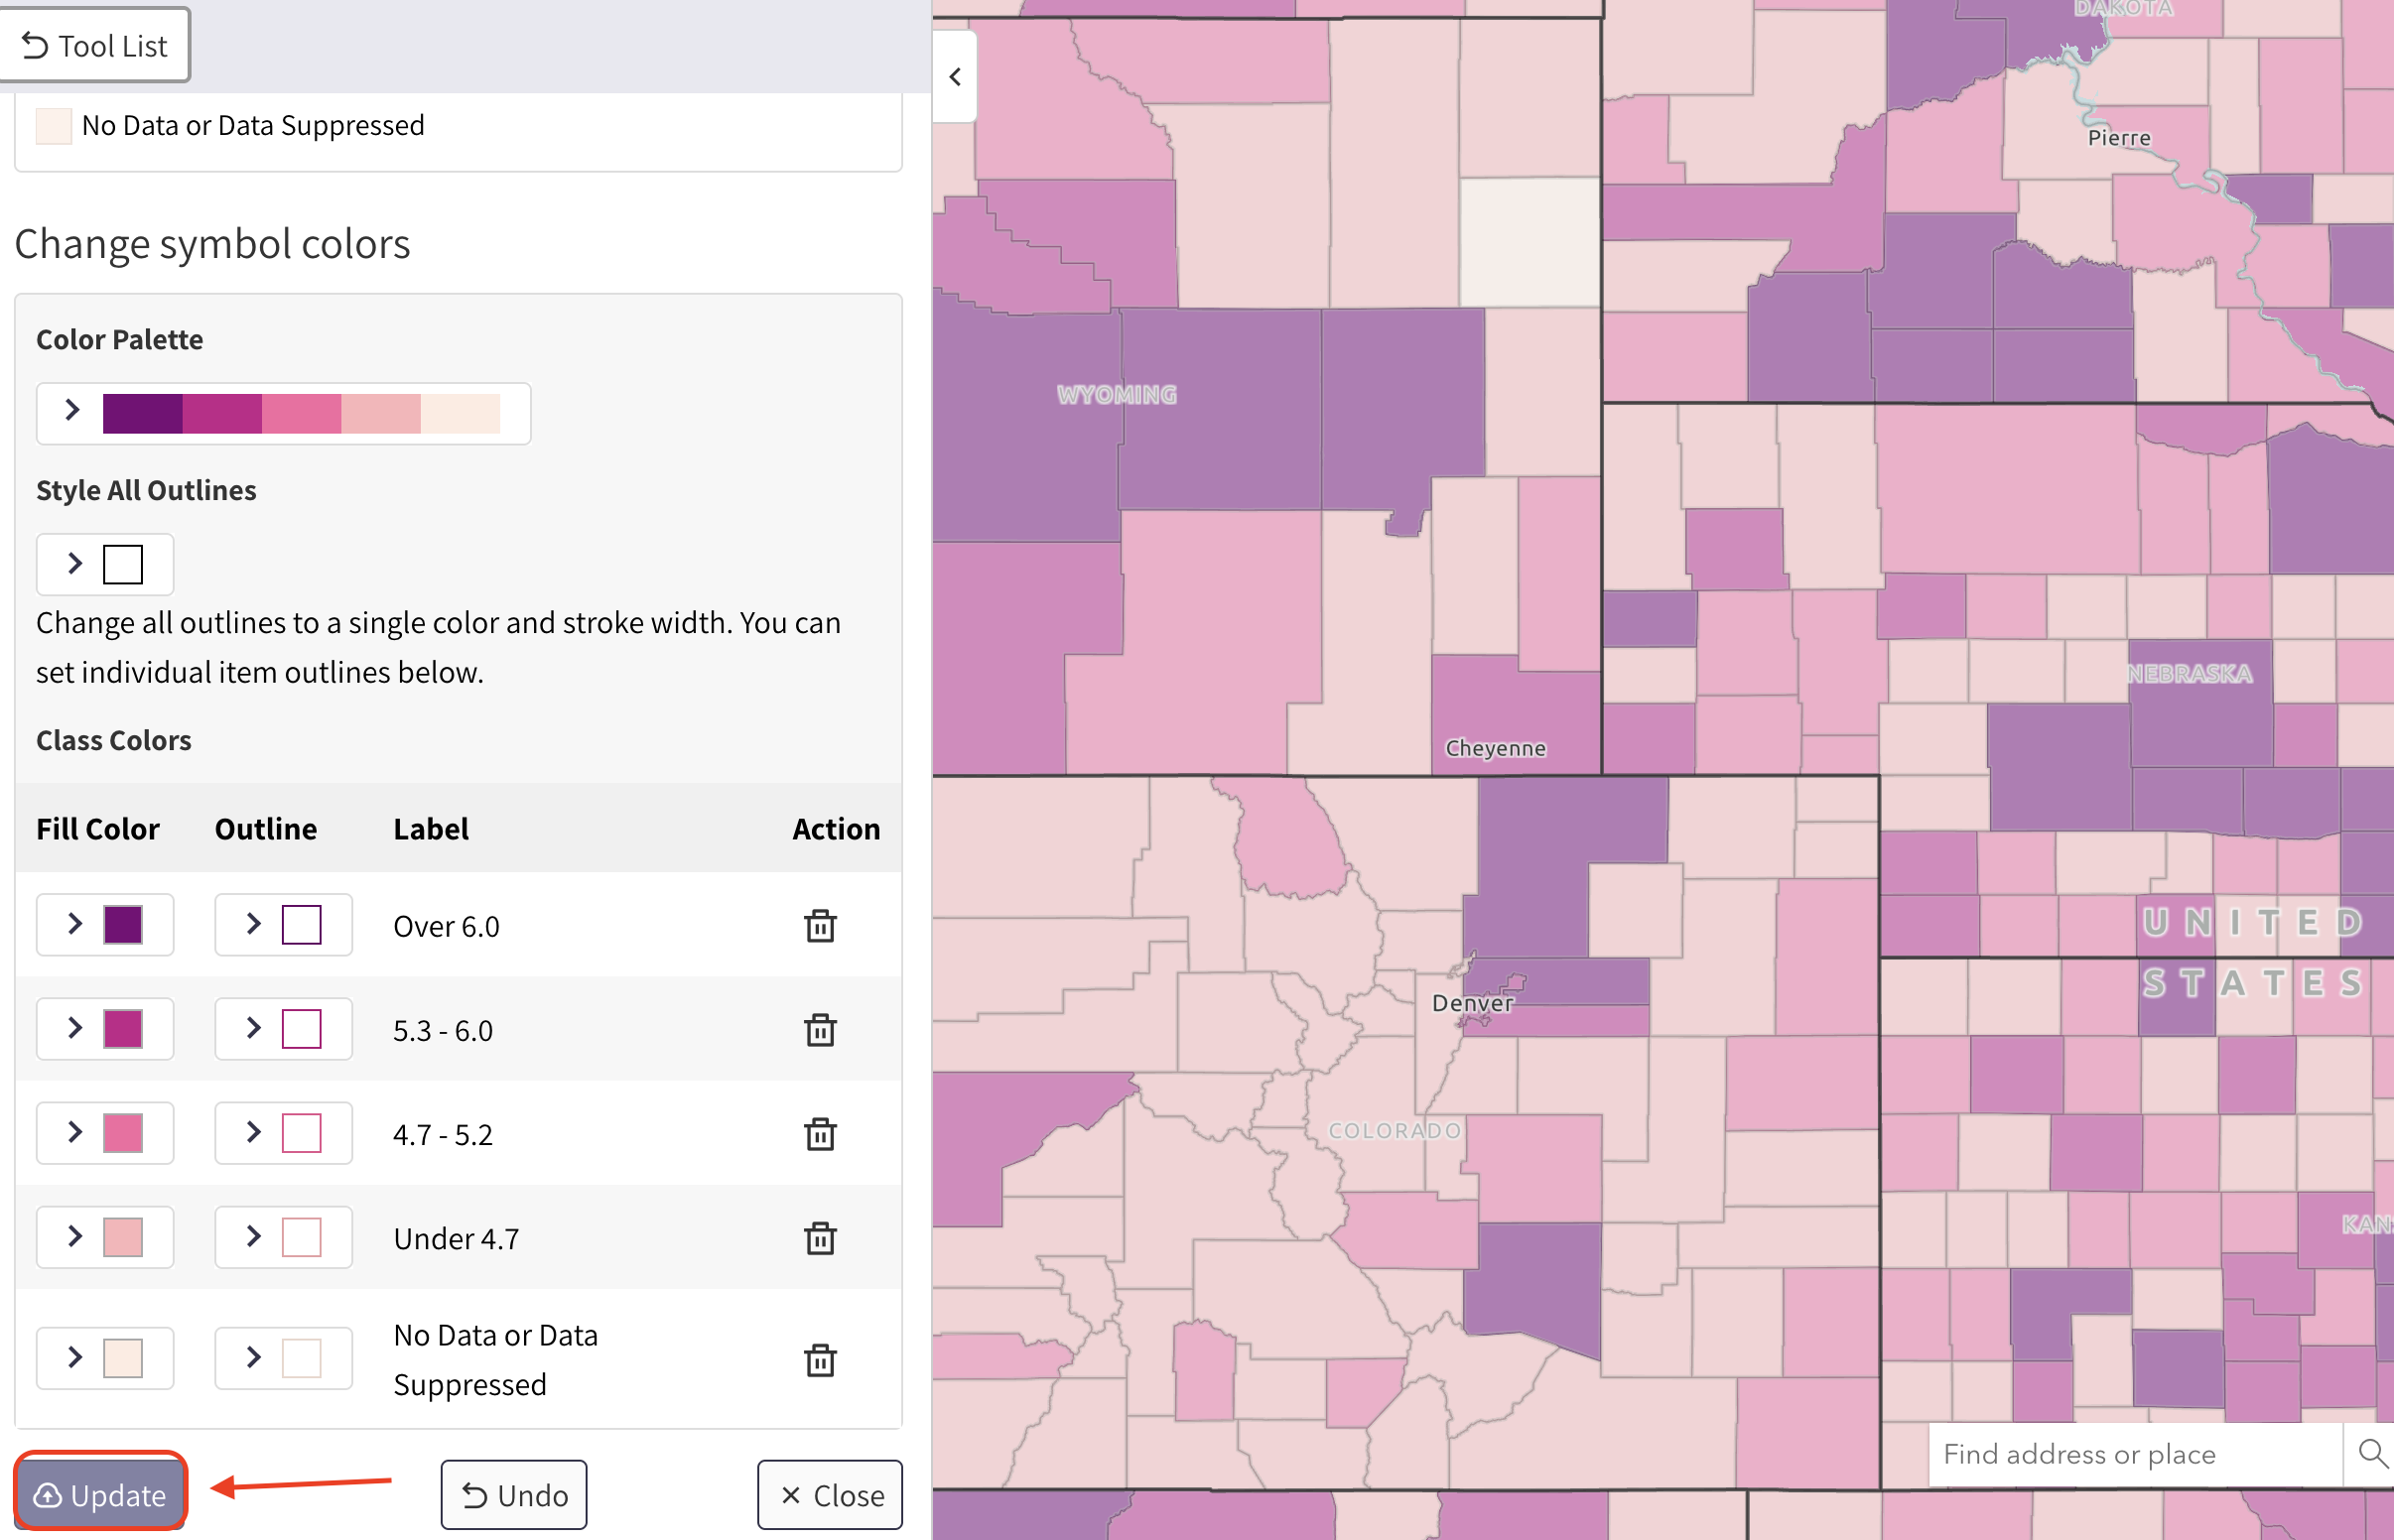
Click the “Update” button in the bottom left (Figure 7, in red) to implement your color changes.
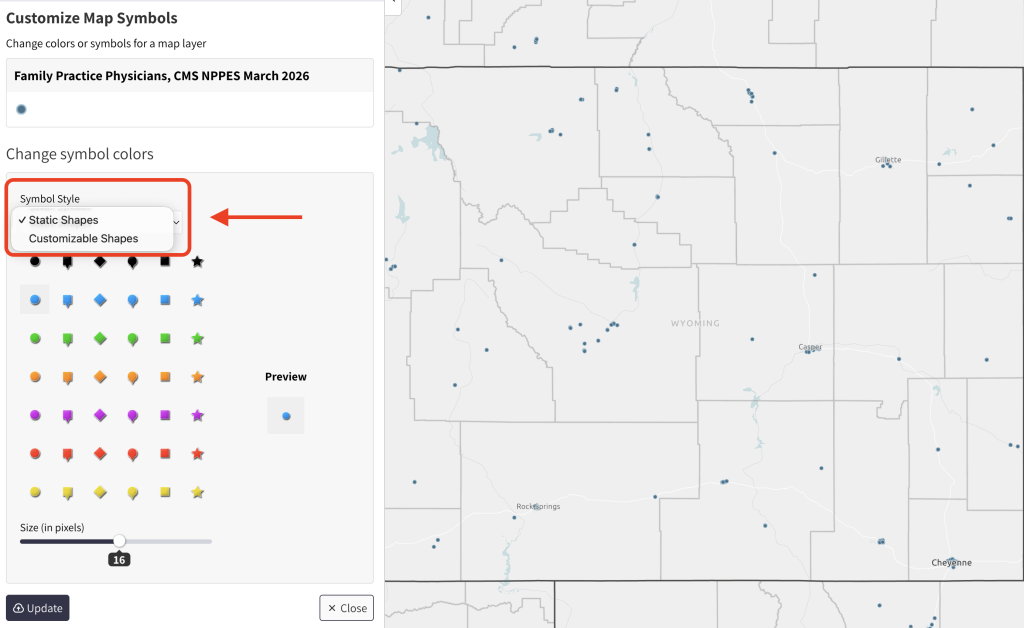
If the layer you added is a point layer, you will have the option to change the symbol.
Use the dropdown to choose between a static or customized shape (Figure 8, in red).
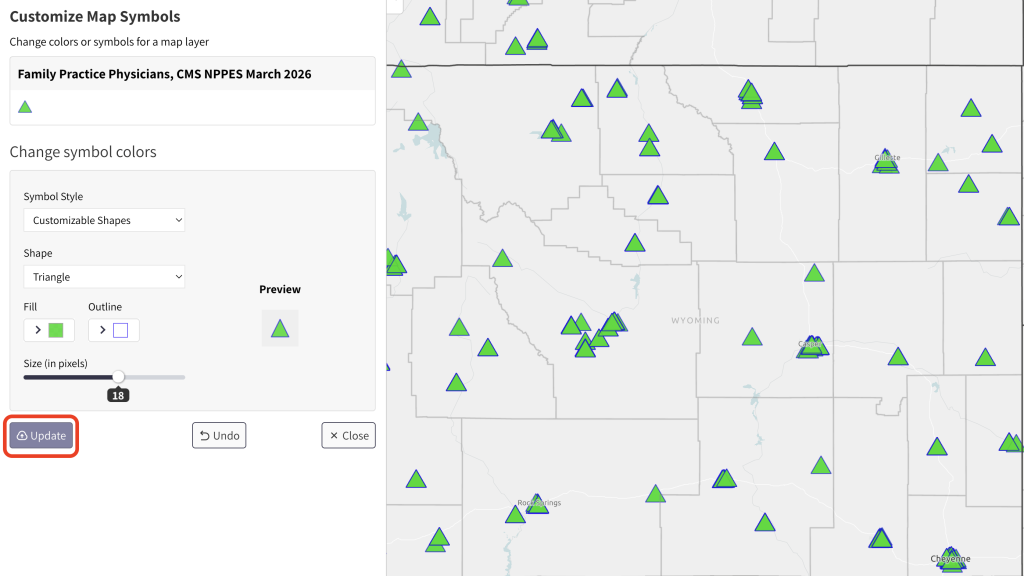
Once you have decided on the shape and color of your symbol, click the update button (Figure 9, in red).
Step 4 – Change Map Labels
To edit map labels, first return to your map legend and ensure labels for your map are turned on by clicking the “label” button (Figure 10, in red).
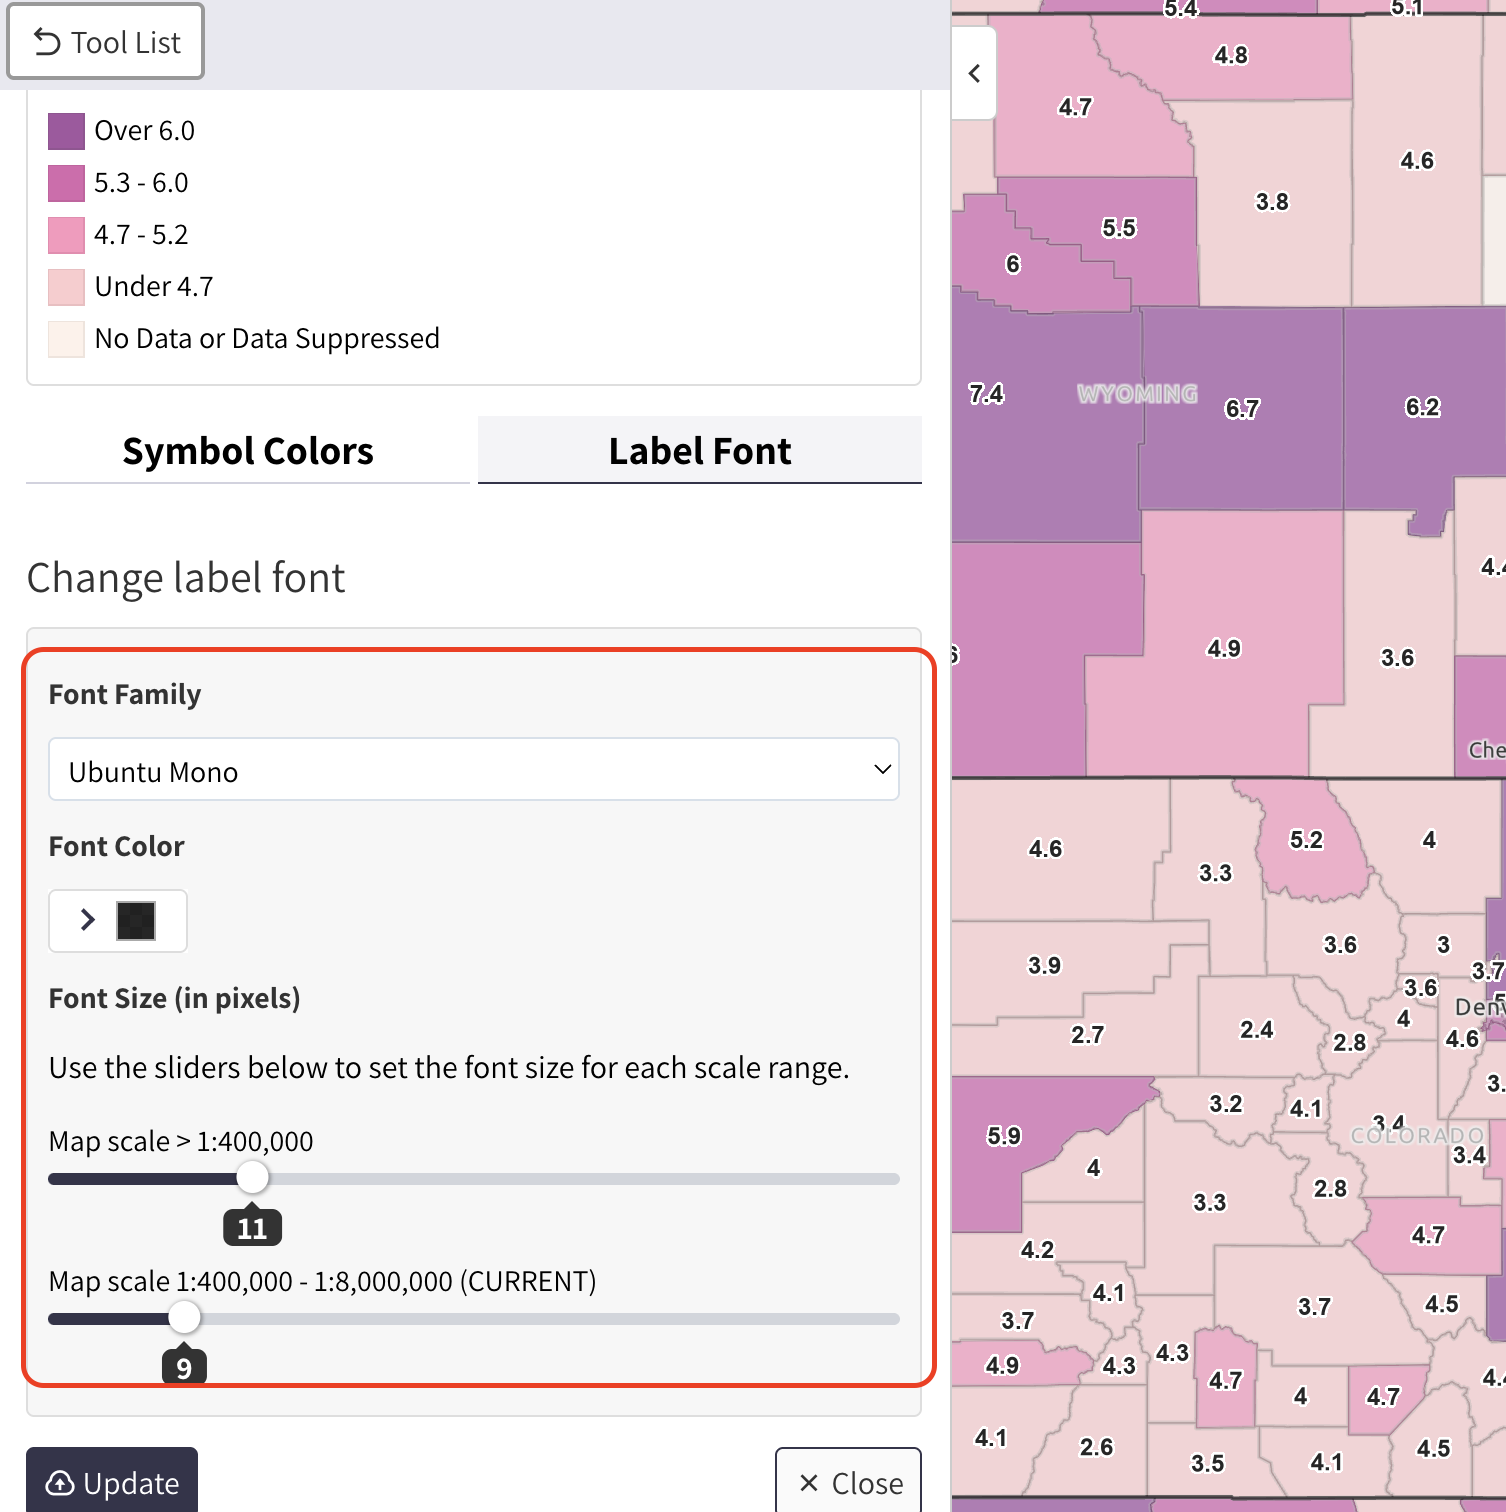
A “Label font” tab will now appear in the editing panel (Figure 11). Click this tab and explore options to change your label font, font color, and scale. Scale refers to the size your font will be depending on how zoomed in or out you are.
Click the “Update” button in the bottom left to implement your changes.